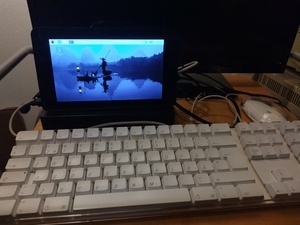
I wanted to have a small ``portable'' computer that is suitable for word processing and lightweight web browsing (e.g. online banking). I don't like laptops which are non-modular and increasingly non-repairable, so I built a prototype using Raspberry Pi and some spare and recycled items I had around. The inspiration was taken from Commodore 64 executive model that was the first luggable color computer with a small 5" monitor.
My hardware requirements for a portable luggable computer:
Optional features:
For the operating system I selected the official Raspberry Pi OS, the 64-bit version based on Debian version 12 (bookworm). For the original install I used the October 10th 2023 version of the install image.
You would think that when using official software and components, everything would work out-of-the-box. That is not the case here. This is a genuine Linux, so you need to tinker around late at night to get something even somewhat working. At least time passes quickly.
The first problem was that when booting the install image for the first time, the boot hangs somewhere with a blank screen. It's attempting to start the GUI in a loop, but always fails. Doing a power reset and connecting an HDMI display helped, so that it was sometimes able to boot, and I was able to enable the SSH server for debugging. The issue turned out to be related to display detection, and googling around I found a workaround. Adding the following magic to /boot/config.txt the system is able to boot all the way to GUI reliably:
[all]
dtparam=i2c_vc_baudrate=50000
The second annoyance was to realize that the official 7" Pi touchscreen display, when mounted on the so-called premium case, is actually upside down. Luckily, the rotation can be changed within the GUI, by clicking:
Preferences -> Screen Configuration
Layout -> Screens -> DSI-1 -> Orientation -> Inverted
This will still leave the boot messages being written upside down. For that, I added the following to /boot/cmdline.txt:
fbcon=rotate:2
Then I disabled the boot Splash Screen to get more verbose output (and also because I couldn't figure out how to rotate the splash screen):
$ sudo raspi-config
System Options -> Splash Screen -> No
Finally I had a reliably booting system with everything displayed with a correct orientation. Actually, the firmware boot splash is still there and wrong way, but since it's a piece of an abstract color art I don't care.
The touchscreen remains at wrong orientation. Since I don't use it, I added the following to config.txt to disable it:
disable_touchscreen=1
Once you start to use the system, you will soon realize that a small 800x480 display does not work at all with some applications. Remember the days when early web sites greeted you with ``Please browse this site with this and that resolution'' non-sense? Well, Linux GUI is just like that still today. Instead of properly adapting to whatever display size they seem to assume some hardcoded size. The most notable example is LXTerminal Preferences settings window - the OK button is out of screen, and for no reason because the window is mostly blank empty space! And this is an LXDE application that is supposed to ``run anywhere''. What a joke.
This problem was annoying and the first thing I tried was setting smaller screen defaults from:
Preferences -> Appearance Settings -> Defaults

For medium screens: Set Defaults
Unfortunately this didn't help. I was already about to throw this project to trash, but again after some late night googling I learned about some ``hidden'' features. While GUI people seem to be poor at implementing generic and usable solutions, they are still good at engineering a lot of neat extra features that help working around the issues they created. The rescue was a feature called ``panning'' that allows creating a larger virtual screen that you can scroll if needed:
$ xrandr --output DSI-1 --panning 1000x1000
After you do this, you can finally press OK in the settings and disable the LXTerminal menu bar from:
Preferences -> Display -> Hide menu bar
Unfortuntely there is no permanent setting for the panning feature so you need to remember to enable it manually whenever needed. Anyway, with the menu bar disabled I can get a reasonaly sized (80x24) terminal on screen. 25th line would be possible if I knew how to disable the title bar from the terminal.
It's amazing how much screen space is wasted when such bars are layed on top of each other. Firefox is another crappy example: there is by default a title bar, tab bar, search box, bookmarks bar.
Later I learned that good old xterm and uxterm provide a full screen mode to allow better user experience on small displays. It's very neat: pressing Alt + Enter gives you a full screen terminal, just like in the old framebuffer console days. I have been using X since 1990s and I was never aware of this handy feature.
The main benefit of using the full screen mode is that you can use one point bigger font to fit 80x25 terminal dimension on screen. I have the following in my .Xresources file:
xterm*faceName: Monospace
xterm*faceSize: 11
The following is also useful to get copy-paste compatible with e.g. Firefox:
xterm*selectToClipboard: true
Too bad Raspberry Pi OS chose to use lxterminal in their default install. I believe the first impression is very poor for many Pi users with small displays.
Raspberry Pi runs on SD card by default. I don't trust storing my data using the internal flash card slot, and also I want to have all my data encrypted, and easily movable to another machine in case of breakage. Therefore I added an external USB drive. I originally experimented with a real hard drive, but decided it was too cumbersome to carry around. So I chose to use USB flash drive instead: the weight and size is minimal, and these days the capacity is also sufficient for my computer usage. (Sounds too good? There is a severe performance penalty - more about that later.)
Luckily, once you have the system up and running, migrating the file system to an external drive is pretty straight-forward and can be done on-the-fly. Just remember to backup all your data before trying.
First, install additional packages needed for disk encryption:
$ sudo apt-get install cryptsetup-initramfs
Then plug an empty USB disk, and partition it:
$ sudo fdisk /dev/sda
Prepare an empty encrypted volume:
$ sudo cryptsetup --verbose --verify-passphrase luksFormat /dev/sda1
WARNING!
========
This will overwrite data on /dev/sda1 irrevocably.

Are you sure? (Type 'yes' in capital letters): YES
Enter passphrase for /dev/sda1:
Verify passphrase:
Key slot 0 created.
Command successful.
Then prepare a new file system:
$ sudo cryptsetup luksOpen /dev/sda1 rootfs
Enter passphrase for /dev/sda1:
$ sudo mkfs.ext4 /dev/mapper/rootfs
Identify the volume and the file system
$ sudo blkid
/dev/mapper/rootfs: UUID="..." BLOCK_SIZE="4096" TYPE="ext4"
/dev/sda1: UUID="..." TYPE="crypto_LUKS" PARTUUID="2cf4ba3a-01"
Update the UUID value of /dev/mapper/rootfs to /etc/fstab replacing the old / entry:
UUID=... / ext4 defaults,noatime 0 1
Also update the same UUID to /boot/cmdline.txt for root= parameter. Then add the other UUID value (the second entry in the blkid list) of /dev/sda1 to activate /dev/mapper/rootfs in /etc/crypttab:
rootfs UUID=... none
Next update the initramfs:
$ sudo update-initramfs -u
NOTE! The new root file system is still empty. Before rebooting, you must sync all data from the currently running file system:
$ sudo mount /dev/mapper/rootfs /mnt
$ sudo rsync -avx / /mnt
$ sudo umount /mnt
$ sudo reboot
Now if you are lucky you should be greeted with the following prompt during the boot:
Please unlock disk rootfs:
However, if the system complains about ``Gave up waiting for root file system device'' and enters the initramfs prompt, you need to activate it manually before proceeding:
(initramfs) cryptsetup luksOpen /dev/sda1 rootfs
Enter passphrase for /dev/sda1:
(initramfs) exit
If this happens, run the above update-initramfs command again after the system is up and running. Ensure that the name of the rootfs entry in /etc/crypttab is exactly what is shown in /dev/mapper/... when running the blkid command. Then try reboot again. (I believe this is a bug or a feature in Debian - the initramfs crypttab won't be populated unless the system is actually running from that entry.)
Once you have switched to use a hard disk the old /dev/mmcblk0p2 partition can be erased and deleted. The SD card is still needed as it contains the firmware partition (mmcblk0p1) needed for booting.
$ sudo umount /dev/mmcblk0p2
$ sudo dd if=/dev/zero of=/dev/mmcblk0p2 bs=1M status=progress
31458328576 bytes (31 GB, 29 GiB) copied, 1697 s, 18.5 MB/s3
dd: error writing '/dev/mmcblk0p2': No space left on device
30013+0 records in
30012+0 records out
31469862912 bytes (31 GB, 29 GiB) copied, 1703.98 s, 18.5 MB/s
$ sudo fdisk /dev/mmcblk0

Welcome to fdisk (util-linux 2.38.1).
Changes will remain in memory only, until you decide to write them.
Be careful before using the write command.
This disk is currently in use - repartitioning is probably a bad idea.
It's recommended to umount all file systems, and swapoff all swap
partitions on this disk.
Command (m for help): d
Partition number (1,2, default 2): 2

Partition 2 has been deleted.

Command (m for help): w
The partition table has been altered.
Syncing disks.

$ sudo reboot
(If you had any personal data stored on the SD card, you may consider more effective ways of erasing the partition.)
Later I decided I wanted file system redundancy as well. What if I'm on the road, and the USB stick breaks? So I plugged another identical USB stick and set up RAID1.
Also RAID1 migration can be done ``on-the-fly'' without re-install. I did roughly the following (I copied these from my quick notes later on, probably not exact steps, but should give an idea):
Plug-in and prepare (create a partition with fdisk) an empty disk. Then create a degraded RAID1, e.g.:
$ sudo mdadm --create /dev/md0 -l raid1 -f -n 1 /dev/sdc1
Encrypt it, and create a new file system:
$ sudo cryptsetup --verbose --verify-passphrase luksFormat /dev/md0
$ sudo cryptsetup luksOpen /dev/md0 raidfs
$ sudo mkfs.ext4 /dev/mapper/raidfs
Identify the volume and the file system:
$ sudo blkid
...
/dev/md0: UUID="..." TYPE="crypto_LUKS"
/dev/mapper/raidfs: UUID="..." BLOCK_SIZE="4096" TYPE="ext4"
Update the UUID value of /dev/mapper/raidfs to /etc/fstab adding a a new /mnt entry:
UUID=... /mnt ext4 defaults,noatime 0 1
(NOTE: The /mnt is just temporary here. We just want to make a single test boot to ensure raid and cryptsetup works.)
Also add the /dev/md0 UUID value to activate /dev/mapper/raidfs in /etc/crypttab:
raidfs UUID=... none
    Next update the initramfs and reboot:
$ sudo update-initramfs -u
$ sudo reboot
If the boot is successfull (and passphrases asked) we end up with the old system still on old rootfs, and the future ``raidfs'' root mounted under /mnt.
Copy all the data from rootfs to /mnt:
$ sudo rsync -avx / /mnt
Switch the root file system from rootfs to raidfs:
Update initramfs and reboot.
$ sudo update-initramfs -u
$ sudo reboot
Because the change from rootfs -> raidfs, after unlocking the drivers you may get the message ``Gave up waiting for root file system device''. If that happens run the following commands:
(initramfs) cryptsetup luksOpen /dev/mda0 raidfs
Enter passphrase for /dev/md0:
(initramfs) exit
And after the boot redo the initramfs update & reboot. Once the system boots successfully and appears to run OK, remove the old file system references (the old ``rootfs'' and its UUID, now mounted under /mnt):
$ sudo vi /etc/crypttab
$ sudo vi /etc/fstab
$ sudo update-initramfs -u
$ sudo reboot
Also unmount and unplug the old drive before the reboot.
Now, once the system is up and running with the new encrypted, but degraded RAID, finish the setup by plugging in a new partitioned drive.
$ sudo mdadm --manage /dev/md0 --add /dev/sdb1
$ sudo mdadm --grow /dev/md0 --raid-devices=2
Now you should see from /proc/mdstat that it has started the recovery. Wait until it's fully synced. It might take a day.-
The Apple mouse that was recycled from a broken G4 iMac is a nice mouse, but has only a single button. This is another case where Linux GUI fails miserably. There is no both simple and working emulation option available, and without the right-click support majority of the applications are unusable.
So far the most usable solution has been to make the right Command key on the Apple keyboard to act as a right mouse button:
$ sudo apt-get install xbindkeys xdotool
$ cat << EOF > .xbindkeysrc
"xdotool keyup Super_R click 3"
Super_R
EOF
The performance of the USB flash storage is very poor. I'd say that a normal spinning disk is probably 10x faster on writes. On reads the difference is not that big. Reliability remains to be seen.
The power consumption is less than 10 W during the normal usage. This is very reasonable, so I didn't even bother to make any more specific measurements (display off, wi-fi off, etc.).
With slow disk, all writing needs to be minimized to get decent usability. Some low-hanging fruits:
Generally any heavy disk usage will get system stuck. Consider using your system to do one task at a time. E.g. if you browse web don't do anything else. Or if you do a package install or distro update, have a cup of coffee meanwhile. Terminal applications are more forgiving. As a rule of thumb: terminal use good, GUI sucks.
The original model was using ``spinning rust'' hard drive:
While the hard drive was also a perfect monitor stand, I decided it was too fragile for portable use. Also the need for an extra AC socket (for the 12 V PSU usually required for hard drives) and USB cable was non-optimal and adding a second drive for redundancy would have been even more cumbersome.
Some things planned for future improvement:
Last updated: 2024-05-11 01:23 (EEST)